Introduction
3D printing technology is often used to construct highly complex objects of different kinds, properties and materials. Despite its numerous advantages, one major drawback of 3D printers is its traditionally slow speed. This is where it fails miserably, in its large scale applicability, against other major manufacturing processes like injection moulding. To overcome this major industry challenge, several 3D companies have come up with more updated and efficient technologies that guarantee quick speeds and utmost accuracy. One of the successful and modern technology is CLIP (short for, continuous liquid interface production).
A typical 3D printing machine such as Stereolithography (SLA) can take several hours to print a 55mm diameter object and maybe several days to complete a larger object, while injection moulding takes minutes for the same.
Additive manufacturing startup Carbon 3D has developed an efficient technology that helps manufacturers cut their costs, waste less energy and materials while speeding up the time it takes to get from concept to product on the market. Some years back, it launched the M1 3D printer. The M1 used UV light in a process called stereolithography to grow objects from a pool of photopolymer resin which was not at all out of the box. But Carbon’s technology allowed it to print in a steady stream rather than layer-by-layer, letting it churn out sophisticated objects up to 100 times faster than traditional stereolithography printers
In order to properly understand how the CLIP technology differs, we need to learn about the basic principles involved in Stereolithography. It’s the process by which a uniquely designed 3D printing machine, called a stereolithograph apparatus (SLA) converts liquid plastic into solid objects layer-by-layer.
How Stereolithography works:
From CAD to STL:
CAD files are digitalized representations of an object to be printed.
There are many different ways to 3D print an object. But nearly all of them utilize computer aided design (CAD) files. In 3D printing, CAD files are translated into Standard Tessellation Language (STL) that 3D printing machines can easily understand. Since additive manufacturing works by adding one layer of material on top of another, CAD models are broken up into layers before being printed in three dimensions.
Basic Working
A SLA machine has four main parts: a tank that can be filled with liquid plastic or photopolymer, a perforated platform that is lowered into the tank, an ultraviolet (UV) laser and a computer controlling the platform and the laser. It starts with an excess of liquid plastic called as photopolymer, which is cured or hardened to form a solid object. In the initial step of the SLA process, a thin layer of photopolymer is exposed above the perforated platform. The UV laser hits the perforated platform, “painting” the pattern of the object being printed. The UV-curable liquid hardens instantly when the UV laser touches it, forming the first layer of the 3D-printed object. Once the initial layer of the object has hardened, the platform is lowered, exposing a new surface layer of liquid polymer. The laser again traces a cross section of the object being printed, which instantly bonds to the hardened section beneath it. This process is repeated again and again until the entire object has been formed and is fully submerged in the tank. The platform is then raised to expose a three-dimensional object. After it is rinsed with a liquid solvent to free it of excess resin, the object is baked in an ultraviolet oven to further cure the plastic. SLA can go top-down (build platform facing up, descending while printing) or bottom-up (build platform facing down, ascending while printing). The bottom-up approach has the advantage that the object can be much larger than the vat itself, as the other approach requires the vat to contain the object. Bottom-up approaches also have an extra step where once a layer is done, the vat needs to ‘rock’ it off the resin (“flexing and peeling the bottom of the vat away from the hardened photopolymer” so that the build platform can be pulled up cleanly.
Continuous Liquid Interface Production
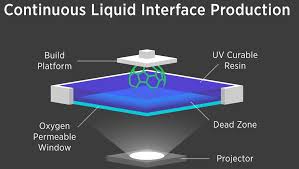
CLIP, which stands for Continuous Liquid Interface Production, eliminates shortcomings of other 3D printing technology by emphasizing a tunable photochemical process over a traditional mechanical approach. The control over the solidification occurs by balancing oxygen and light to discriminately cure photo liquid resin. Continuous Liquid Interface Production technology uses components as shown in the image above such as
- BUILD PLATFORM
- UV CURABLE RESIN
- OXYGEN-PERMEABLE WINDOW
- DEAD ZONE
- PROJECTOR
How the CLIP Process Works
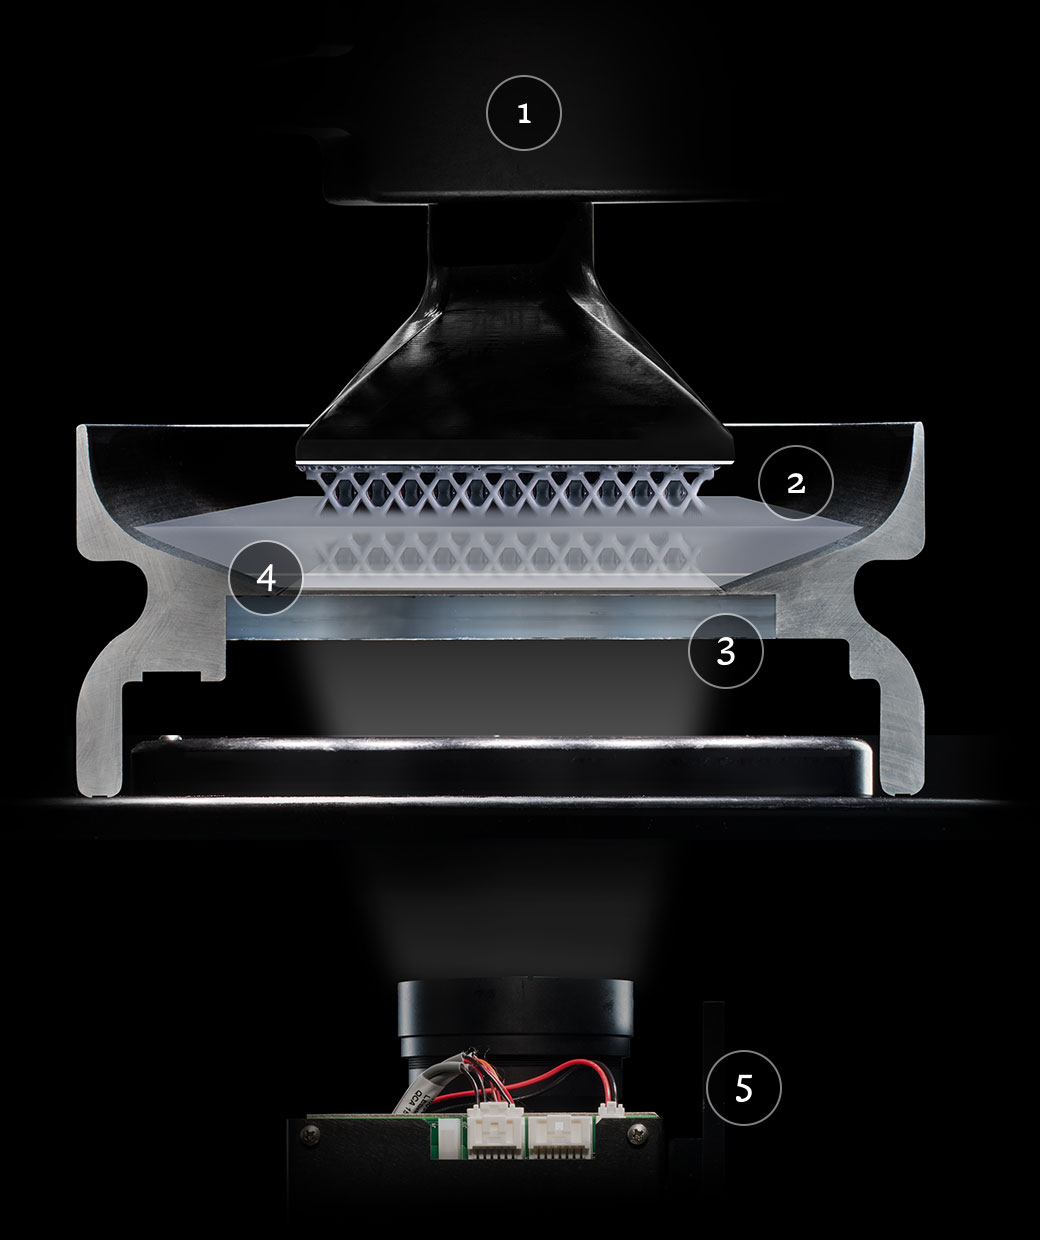
Carbon’s technology works through two phases. The first one, CLIP, consists of shaping the part by projecting a light through an oxygen-permeable window into a reservoir of UV-curable resin. As the UV images are projected in a sequence, the part solidifies and the build platform rises, allowing 3D objects to continuously grow without interruption. This is similar to SLA with a slight difference: it introduces oxygen into the liquid resin in order to control what is known as the dead zone.
The dead zone is a thin, liquid interface of uncured resin between the window and the printing part where the light passes through.
During the development stage, images are fed into the system using a digital light projector via an oxygen permeable UV transparent screen. This process takes place beneath a liquid resin bath.
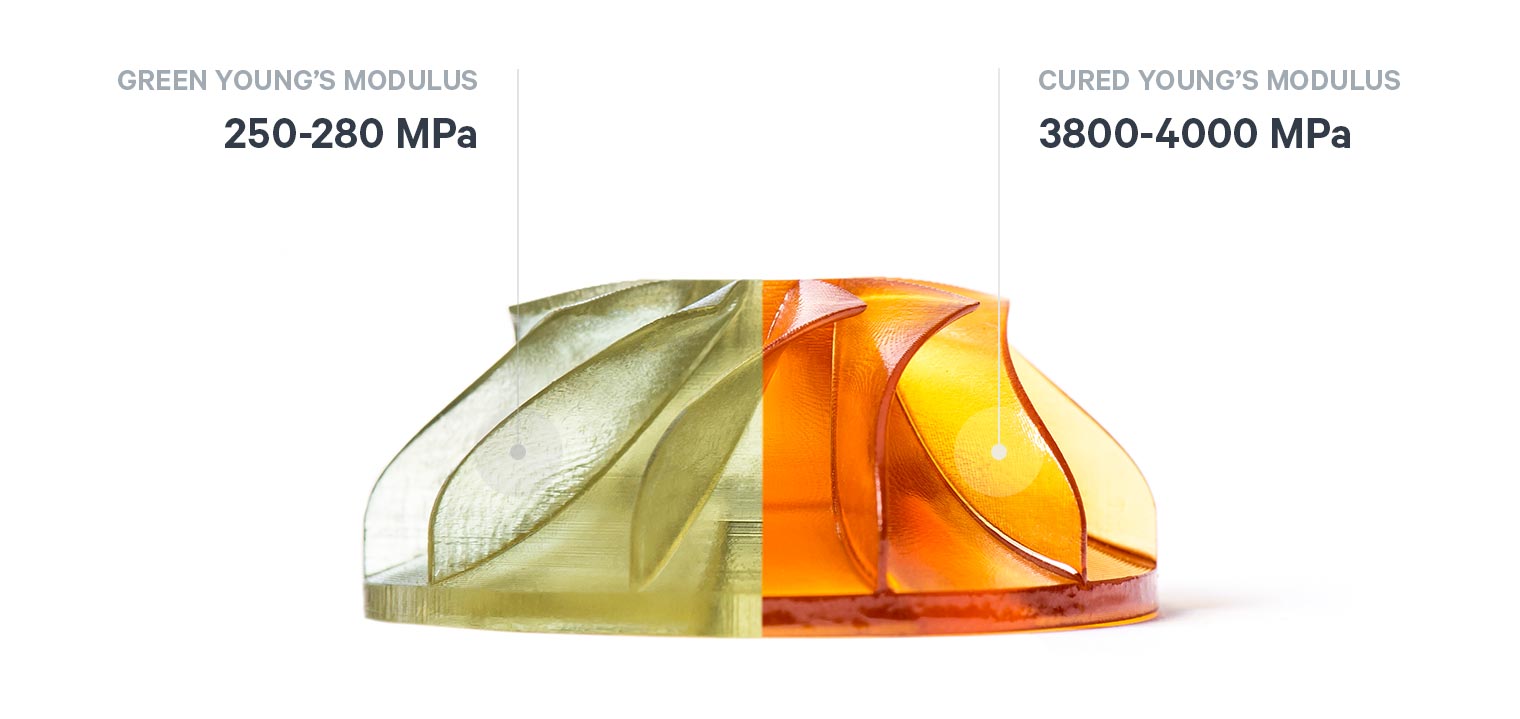
The second phase consists of thermal curing by baking the parts in a forced circulation oven to set off the properties of the materials. Through this process, a secondary chemical reaction sets off and causes the materials to adapt and strengthen, ultimately achieving desired engineering-grade mechanical properties.
Comparison:
Now, as we are aware of the basic working of both the techniques, we can now understand what sets them apart in terms of speed. CLIP is much faster than bottom-up technologies that require a peel step between every layer as the cured layers stick to the resin container. That is, by far, the slowest step of SLA printing with most modern light sources. CLIP is a bottom-up technique that doesn’t require a peel step, because the vat creates an oxygen layer over the window that keeps the resin from curing directly on the surface and sticking. In that way, it arguably performs more like a top-down printer than a bottom-up printer.