If you have just started exploring microcontrollers and experimenting with development boards like Arduino and Raspberry Pi, you might have had struggles with configuring the board and interfacing them with the hardware that you used to build your little fascinating circuits. I too, faced some issues when I had to set up my Raspberry Pi B+ model.
Most of the instructables available online give instructions for working with a separate monitor connected to RPi using a HDMI cable. However, to make things convenient, you can use your laptop display itself to work with your Rpi. This requires a few additional steps which I will be covering in the last section of this tutorial. So, this article is a step by step tutorial to help you kick start your Raspberry Pi and dive into the Internet of Things!
Unlike an Arduino, you need to have an operating system to start working with your RPi. The most famously used OS for RPi is Raspbian, based on Debian, a Linux distribution.
I - Steps to format SD card to flash the Raspbian image later
A 16GB SD card should suffice for flashing the Raspbian image onto it.
1) Download SD Formatter 4.0 for Windows from here
2) Insert your SD card into the computer or laptop’s SD card reader and make a note of the drive letter allocated to it, e.g. F:/
3) In SD Formatter, select the drive letter for your SD card and format it.
4) Under Option > choose Format Type as Full (Erase) > set Format Size Adjustment as ON to format the full space present in SD card if formatting the SD card for the first time. Otherwise, Quick format type should also be fine.
==> Now we have a formatted SD card on to which the Raspbian image can be flashed later.
II - Steps to flash Raspbian image on to SD card
1) On your Windows laptop, go here
2) Click on Raspbian (so as to flash the Raspbian image on to SD card).
Note: NOOBS can be used for installation if we have HDMI cable and display monitor.
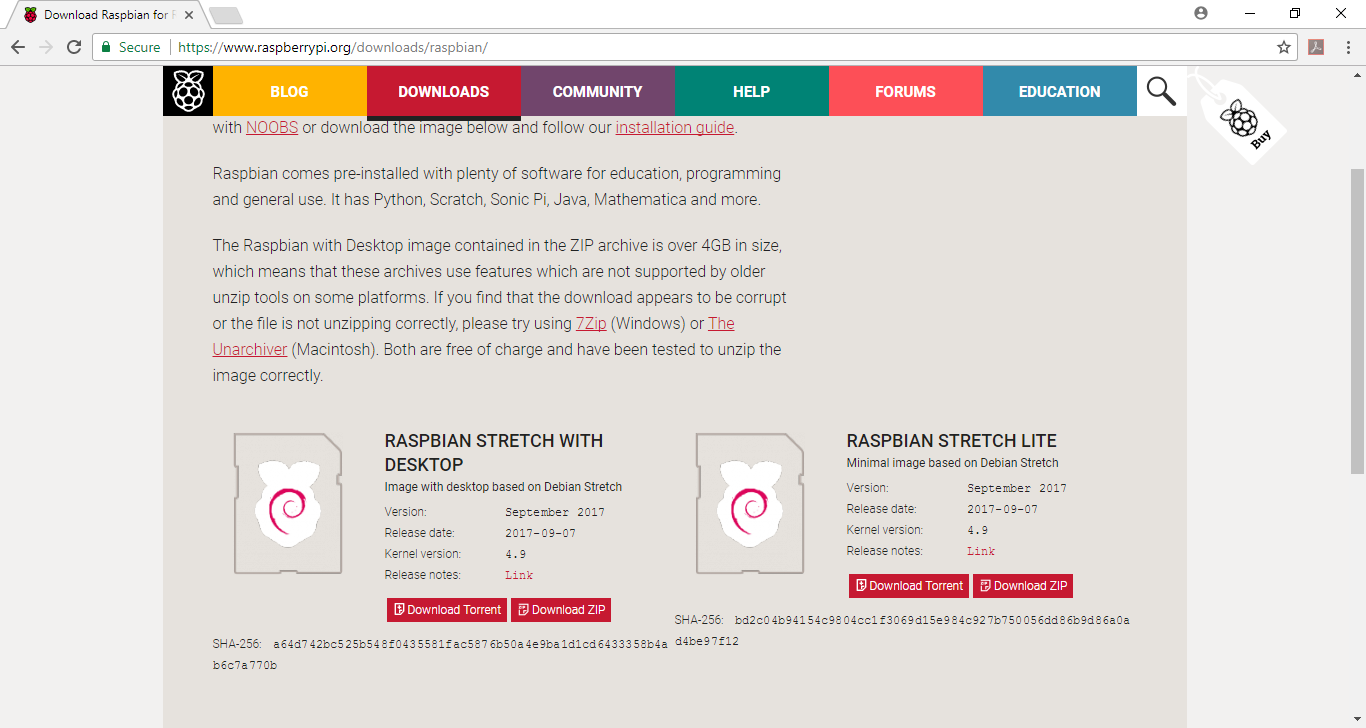
3) Download RASPBIAN STRETCH WITH DESKTOP so that we can have a desktop to work on, if necessary. Download Torrent (it is faster )
4) Extract the files from the zip file downloaded in Step 3 to extract the Raspbian image (.img file).
5) From here, download and install the Etcher SD card image utility.
6) Run Etcher and select the Raspbian image you unzipped (.img file) on your computer or laptop.
7) Select the SD card drive. Note that the software may have already selected the right drive
8) Follow the instructions of Etcher to flash the Raspbian image on to SD card.
9) Open the root folder in the SD card and create a file (SSH). Note that the filename should not have any extension.
This is required to make Raspberry Pi enable SSH so that we can connect later from PuTTY through SSH. Here, your laptop will later serve as the SSH client and your RPi will be the SSH server.
==> Now the SD card contains the Raspbian image with SSH enabled.
Follow the below mentioned steps if you are working in the comfort of your home network. If not, skip 3(a) and move ahead to 3(b).
III(a) - Connecting the SD card to Raspberry Pi and setting up (home network)
1) Take your Raspberry Pi and connect to the router (for example, DLink router) directly using a LAN cable.
2) By typing ipconfig (in Windows) in your command prompt, find out the IP address of the machine you are using.
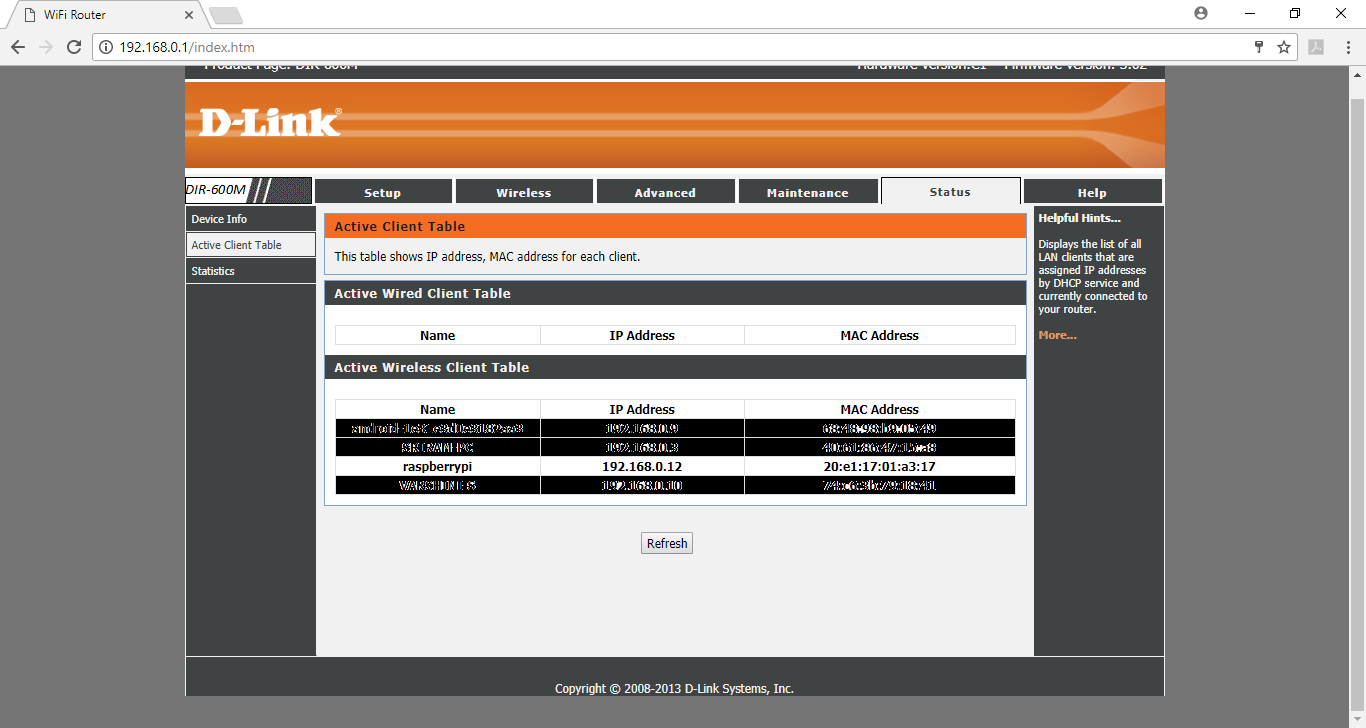
Check the Active Client Table of your router configuration. There will be an IP address allocated for your RPi. Note the IP address (e.g. 192.168.0.12).
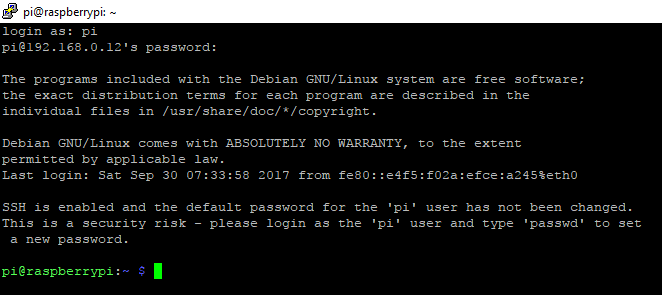
3) Using PuTTY, connect to the IP address, 192.168.0.12(this is just an example).
4) It will get connected to Raspberry Pi and will ask for username/password.
Provide username as pi and password as raspberry (Pi is the default username and raspberry is the default password)
We can see the RaspberryPi prompt getting displayed and we are connected to the Raspberry Pi through SSH.
III(b) - Connecting the SD card to Raspberry Pi and setting up (to connect to mobile hotspot or any other WiFi network)
Connecting to a WiFi network when you are on the go can be a hassle as finding the IP address of your RPi can be difficult. Here’s a YouTube video if you are facing similar issues.
IV - Configuring WiFi for Raspberry Pi
Raspberry Pi Configuration Documentation
1) In the SSH terminal of PuTTY, give the command
sudo iwlist wlan0 scan
You will be able to see the list of WiFi connections available.
2) If you want to connect to a specific WiFi network, for example, rpi, give the following command so that it generates the WiFi configuration information which needs to be updated at the bottom of the file -
/etc/wpa_supplicant/wpa_supplicant.conf
wpa_passphrase "rpi" "wifipassword"
The output will be as follows:
network={

ssid = <rpi>

#psk = <wifipassword>

psk=c84f3033b09512fbd632a0510ba0cf0f9b8f7a8f8e3e075cdfa76b8036bab9e8

}
Note: This is just an example. You need to specify your network name in place of rpi and the password for it in place of wifipassword.
3) The above output needs to be copied to bottom of the file
/etc/wpa_supplicant/wpa_supplicant.conf
after removing the line containing #psk for security purpose as we do not want to store the WiFi password in plain text.
4) Command to open the file and copy the network settings at the bottom on the file -
sudo nano /etc/wpa_supplicant/wpa_supplicant.conf
5) Automatically, WiFi will be configured after sometime. We can also make sure it happens by issuing the following command
sudo wpa_cli reconfigure
6) You can verify whether it has successfully connected, using the command
ifconfig wlan0
If the inet addr field has an address beside it, the Raspberry Pi has connected to the network.
For example, the IP address may be 192.168.0.5. This is the IP address of Raspberry Pi through WiFi connection rpi (example).
Now, if you are equipped with a HDMI cable, a monitor, a keyboard and a mouse, you are all set to go and discover the capabilities of the credit card sized computer that you possess. However, if you do not have a monitor, do not worry as the last step of this tutorial is aimed to eliminate that need. You can use your laptop display and remotely access your RPi using SSH. So, do not give up hopes after coming this far! One final step and you are done!
V - Setting up the Raspberry Pi to connect to laptop display
DIY Hack - Connect RPI to Laptop’s Display
1) To start VNC, enter the following command in the SSH terminal:
vncserver :1
2) In the client side laptop, Download VNC Viewer from here
Make sure to select Windows if installing VNC Viewer for Windows laptop
3) Now click on VNC Viewer. A dialog box will be displayed. If the Raspberry Pi’s IP address is say 192.168.0.5, in the VNC Server field, provide the value as 192.168.0.5:1 and click OK. For password, enter Raspberry’s username and password.
==> Now the Raspberry Pi’s display will be shown on the laptop display.
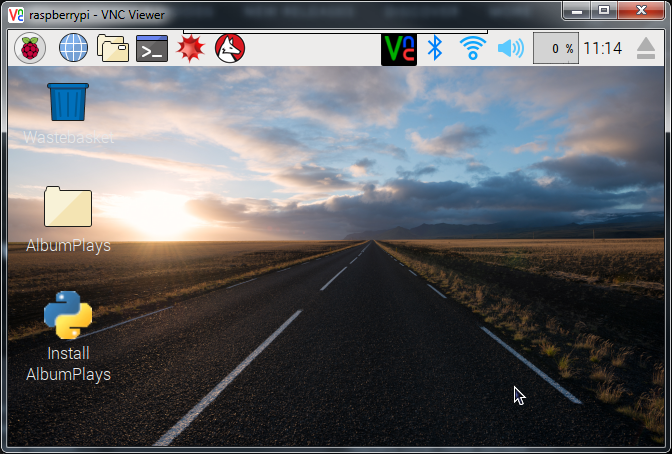
And finally, you are done! Without further ado, enjoy exploring!